DictateDash Help Center
Welcome to the official help documentation for DictateDash. This guide will walk you through everything from getting started to mastering the advanced features.
1. Quick Start: Your First Transcription
DictateDash is designed to work right out of the box. Here’s how to get your first transcription in under a minute:
- Launch DictateDash: After installing, you'll see the Control Center and an icon in your system tray.
- Press the Hotkey (
Control+Alt+R): The status indicator will turn green, signaling that recording has begun. - Start Speaking: Dictate a sentence or two.
- Press the Hotkey Again (
Control+Alt+R): The status indicator will turn yellow as the bundled local model transcribes your speech. - See Your Text: In a few moments, the transcribed text will appear in the "Recent" viewer at the bottom of the Control Center.
That's it! You've just used the default, private, offline model to turn your voice into text.
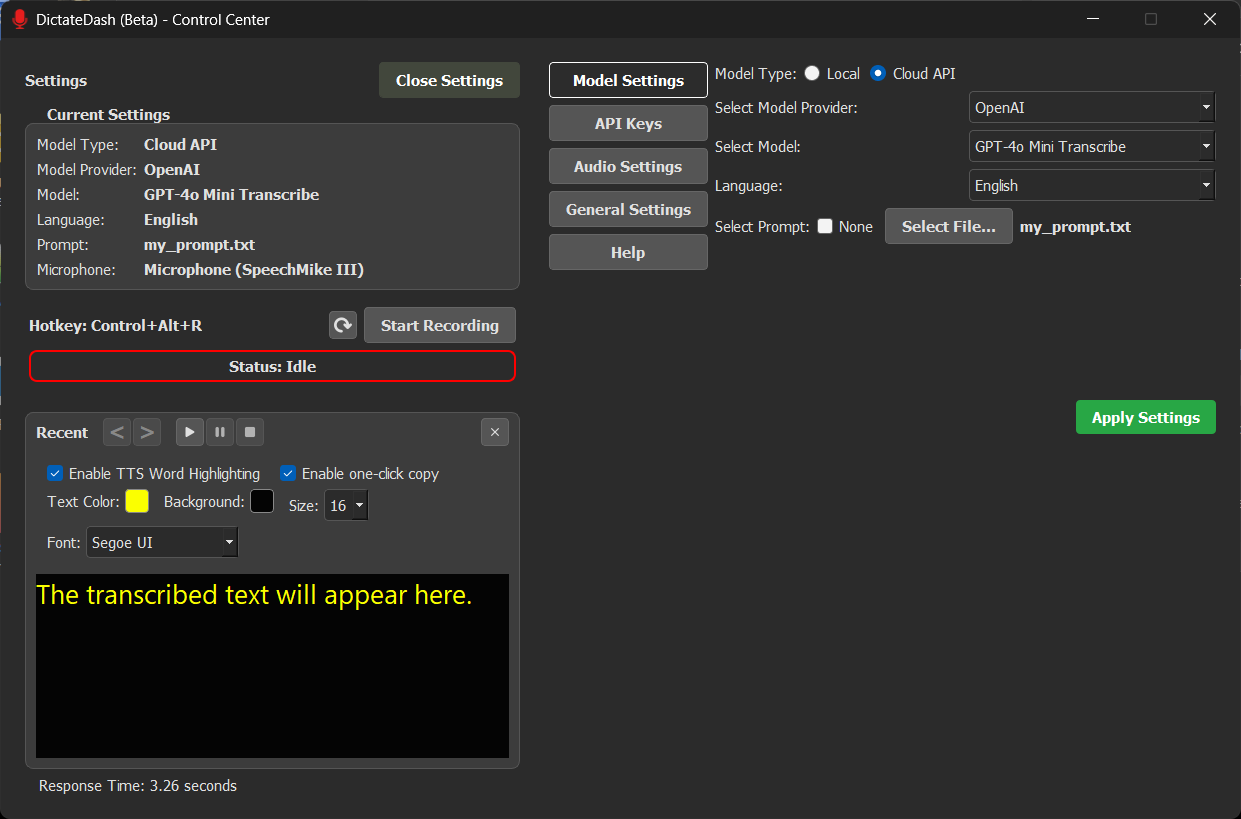
2. The Main Window (Control Center)
The Control Center is your central hub for interacting with DictateDash. It provides an at-a-glance view of your settings and direct control over recording and transcription.
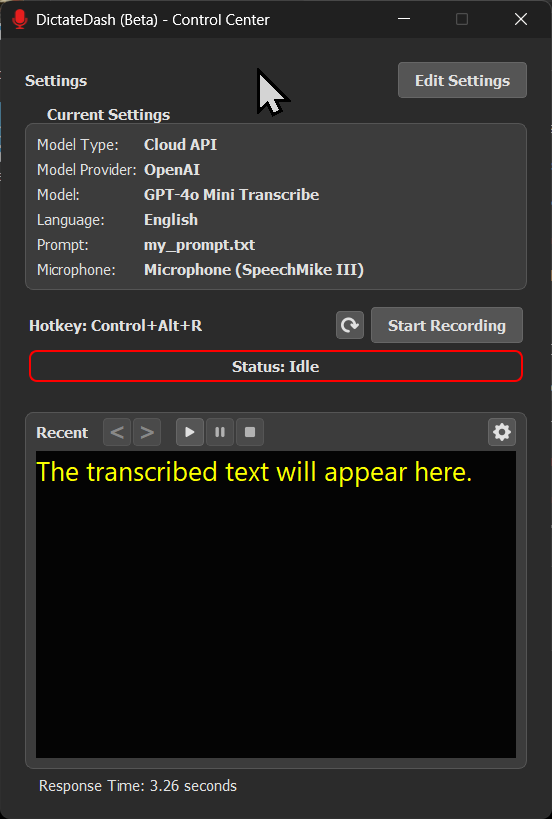
Current Settings Display
This panel on the left gives you an at-a-glance view of your current configuration, including the active model, language, and microphone. To change these, click the Edit Settings button.
Recording Controls & Status
The core of the application is the recording flow, managed by the buttons and status bar.
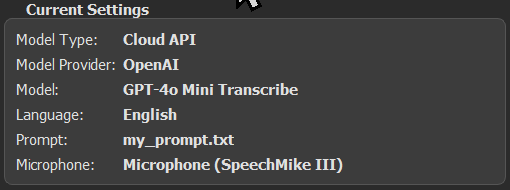
- Status: Idle (Red Border): The application is waiting for you to start a recording.
- Click Start Recording or press the global hotkey
Control+Alt+R.
- Click Start Recording or press the global hotkey

- Status: Recording in Progress (Green Border): The application is actively listening through your microphone.
- Transcribe: Click this button (or press the hotkey again) to stop recording and begin transcription.
- Cancel: Click this to discard the current recording without transcribing. This is useful for accidental recordings or mistakes. The app will return to the "Idle" state.

- Status: Transcribing (Yellow Border): The audio has been sent to the selected speech-to-text model (either locally or in the cloud) and is being processed. The button will be grayed out until the transcription is complete.
Visual Feedback System
To give you a clear, consistent signal of the application's state, the color of the status bar border, the title bar icon, the taskbar icon, and the system tray icon will all change simultaneously:
- Red: Idle / Ready
- Green: Recording
- Yellow: Transcribing
Global Hotkey (Control+Alt+R)
The hotkey works globally across Windows, meaning DictateDash does not need to be the active window.
- From Idle: Pressing the hotkey starts a recording.
- During Recording: Pressing the hotkey again stops the recording and starts the transcription.
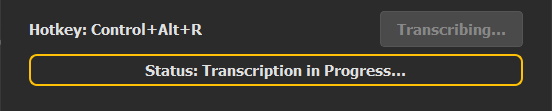
3. The Recent Transcription Viewer
This is where your transcribed text appears.
- Transcription Time: Located below the viewer (e.g.,
Response Time: 3.26 seconds), this shows the time it took the selected model to process your audio. This is helpful for comparing the performance of different models. - History Navigation: Use the
<and>arrow buttons to cycle through your last five transcriptions. - One-Click Copy: By default, you can click anywhere on the transcribed text to instantly copy it to your clipboard. A "Copied to clipboard!" message will confirm the action.
Text-to-Speech (TTS) Controls
You can have your transcribed text read aloud using your system's default voice.

- Play: Starts reading the text from the beginning or resumes from where it was paused.
- Pause: Pauses the playback.
- Stop: Stops the playback completely. Hitting play again will start from the beginning.
Viewer Settings (Gear Icon)
Click the gear icon in the top-right corner of the viewer to open a toolbar for customizing its appearance. Click the close icon (which replaces the gear) to hide it. All changes here are applied instantly.

- Enable TTS Word Highlighting: (Default: On) When enabled, each word is highlighted as it's being read aloud.
- Enable One-Click Copy: (Default: On) Toggles the ability to copy all text with a single click inside the viewer.
- Text Color / Background: Choose custom colors for the text and background of the viewer to suit your visual preferences.
- Size: Adjust the font size of the transcribed text.
- Font: Select from a list of fonts, including standard system fonts and dyslexia-friendly options like OpenDyslexic (which is bundled with the app).
4. The Settings Panel
Click Edit Settings to open the main settings panel. Here you can configure every aspect of the application.
IMPORTANT: For any changes you make in the Model, API Keys, Audio, or General settings tabs, you must click the "Apply Settings" button at the bottom right for them to take effect. Settings are applied on a per-tab basis.
Model Settings Tab
This is where you choose your speech-to-text engine.
- Model Type:
- Local: Processes your voice on your computer. This is completely private, works offline, and is free to use.
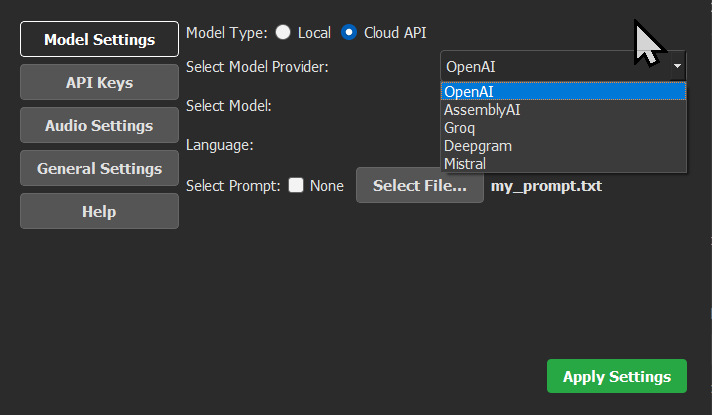
- Cloud API: Sends your voice to a third-party provider for transcription. This generally offers higher accuracy but requires an internet connection and an API key.

Using Local Models
- Select Model Provider:
- Whisper.cpp: (Default) Provides an excellent balance of speed and accuracy.
- Vosk: Another option that can be faster but may have lower accuracy than Whisper models.
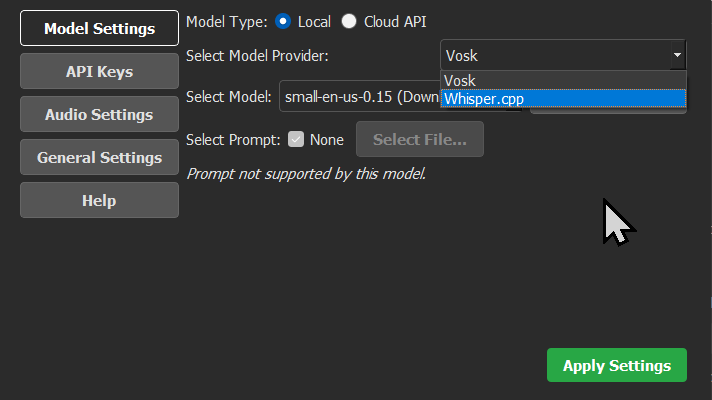
- Select Model:
- Green Models: These models are already downloaded and ready to use. A "Delete Model" button will appear next to the dropdown.
- Red Models: These models are available for download. The button will change to "Download Model." Click it to start the download, and a progress bar will appear.
- Model Size: The size (MB/GB) is listed next to each model. Larger models are generally more accurate but require more system resources and take longer to transcribe.
Using Cloud API Models
- Select Model Provider: Choose from a list of industry-leading providers.
- OpenAI: (Recommended for highest accuracy) Offers
GPT-4o Mini TranscribeandGPT-4o Transcribemodels. Both provide exceptional results. - Groq: Very fast transcriptions using Whisper Large models at a reasonable price.
- Deepgram: Offers a wide variety of general and domain-specific models (e.g., for medical or financial terms).
- AssemblyAI: Supports multiple languages.
- Mistral: A very fast and free-to-use option, offering a great balance of performance for users who don't want to use a local model.
- OpenAI: (Recommended for highest accuracy) Offers
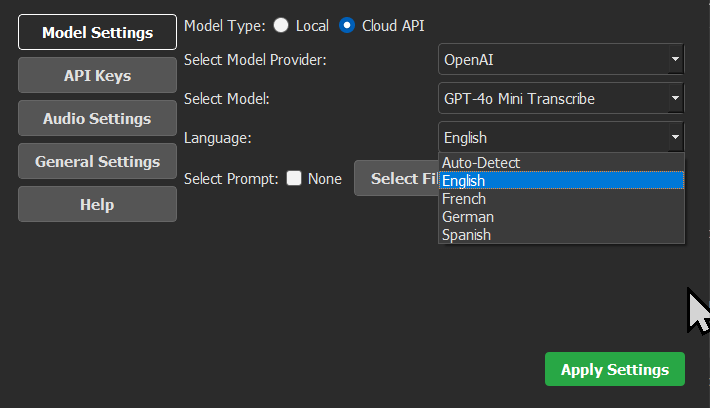
- Language: For cloud providers, you can often specify a language to improve transcription speed and accuracy.
Using Prompts
The Select Prompt dropdown allows you to load a plain text (.txt) file containing a list of keywords, names, or specific jargon. This provides context to the model, dramatically improving its accuracy for non-standard words. Using a text file allows you to easily manage and reuse your prompts across different models.

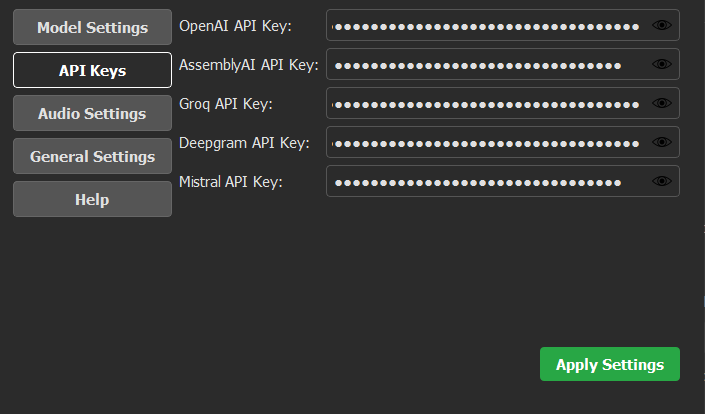
API Keys Tab
To use any Cloud API model, you must provide an API key.
- Obtain an API key from the provider's website (e.g., OpenAI, Groq).
- Paste the key into the corresponding field in this tab.
- Click the eye icon to toggle the visibility of your key.
- Click Apply Settings in this tab to save your keys.
Your API keys are securely encrypted on your system using the Windows Data API.
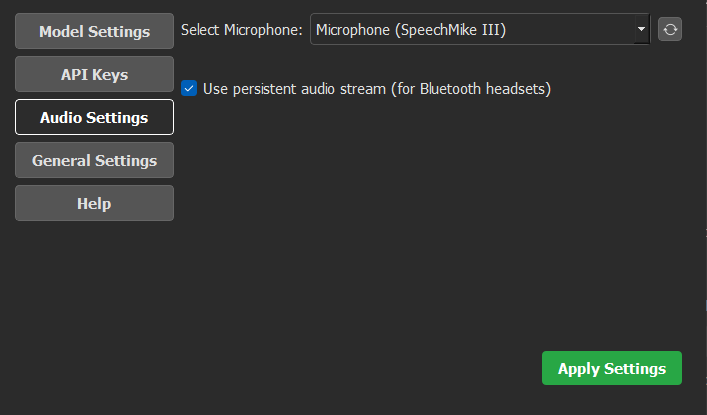
Audio Settings Tab
- Select Microphone: Choose your preferred input device from the list. Click the refresh button if you've recently connected or disconnected a microphone.
- Use Persistent Audio Stream (for Bluetooth headsets): (Default: Off) Check this box if you are using a Bluetooth headset. It helps reduce the 2-3 second delay that can occur when starting a recording as the headset switches profiles. This keeps the microphone "warm" and ready for instant recording. Note: This is an experimental feature and may not work perfectly with all devices.
General Settings Tab
Customize the application's behavior and workflow.
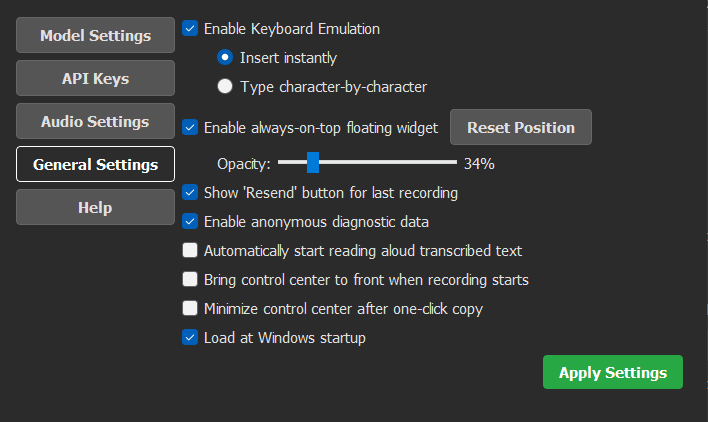
- Enable Keyboard Emulation: (Default: On) This is the core feature for a seamless workflow. When enabled, the transcribed text is automatically inserted wherever your cursor is located.
- Insert instantly: (Default) The full text appears at once. This is the recommended mode.
- Type character-by-character: The text is typed out with an animation. This is purely cosmetic and may be slower.
- Enable always-on-top floating widget: (Default: Off) Displays a small, draggable microphone icon that stays on top of all other windows. This widget provides visual feedback on the app's state (red/green/yellow) and can be clicked to start/stop recordings.
- Opacity: Control the transparency of the widget.
- Reset Position: If you lose track of the widget, click this to return it to a default position and size.
- Show 'Resend' button for last recording: (Default: On) A refresh-style button appears next to the Start Recording button. This allows you to re-transcribe your last audio recording with a different model, which is perfect for comparing model accuracy and speed.
- Enable anonymous diagnostic data: (Default: On) Helps improve the application by sending anonymous usage data (e.g., which features are used). No personal data, audio, or transcripts are ever collected.
- Automatically start reading aloud transcribed text: (Default: Off) If checked, the text-to-speech feature will begin automatically as soon as a transcription is received.
- Bring control center to front when recording starts: (Default: Off) Useful for users on smaller screens. When you start a recording via the hotkey, the Control Center window will automatically pop to the front.
- Minimize control center after one-click copy: (Default: Off) When used with the above option, this creates a clean workflow: the window appears for transcription, and after you copy the text, it minimizes itself to get out of your way.
- Load at Windows startup: (Default: On) DictateDash will start automatically with Windows. By default, only the system tray icon will appear; you can open the full Control Center by double-clicking the tray icon.